
Someone was talking about listing and having to make more and more appliers for heads/tails/accesories for their mods and this got me thinking about some of my friends who keep having to made a lot of rework and appliers for A-B-C-D because each thing is different or how I recently received a custom mod that included and applier and it made me feel bad because they could have simply made it BOM and voila!
So this is going to be a post about HOW to make something BOM and hopefully this will help more than one content creator or user.
WHAT IS BOM? A short introduction:
BOM or Baked on Mesh is a new updated technology in Second Life introduced on August 26th, 2019. Baked on Mesh (BOM) allows you to use system textures (typical SL clothes/skin/makeup layers) to use them on items like mesh bodies, heads and more.
With BOM, you can apply any of these layers to your avatar without the use of an Alpha Layer, and then tell the viewer to apply the resulting baked texture to your selected object/head/accessories.
For more detailed information you can read the Second Life Community post HERE.
HOW DO I USE BOM FOR A PRODUCT?
The answer is simple, layers. As you know with the introduction of Tattoo layers to Second Life stacking for style became a thing, this is where you will find a way to use the body part layers + the clothing layers to your favor.
When you create your set of textures for a customer or for a Marketplace/In-world sale furry content creators specially are faced with having to create head, accessories, tail, ears appliers and more, with the advantage of BOM and the channels it allows you to have, you no longer require to make those, as long as you teach your customer how to prep their stuff for BOM.
Step 1: Learn your layers.
Usually a mod will have a skin + specific body parts. Certain creators do not allow their stuff to be mod, so they require that you use an applier, and if your customer asked you for that specific part, well you will need to do it, but if they didn’t you can do everything with BOM.
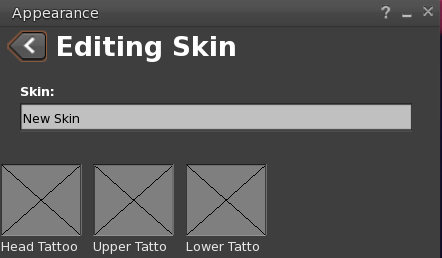
Skin (Body Part) and Makeup (Clothing) system components in SL come with slots to place: Head, Upper and Lower Body Tattoos/Layers. And they stack based on priority, so you need to keep these in mind.
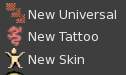
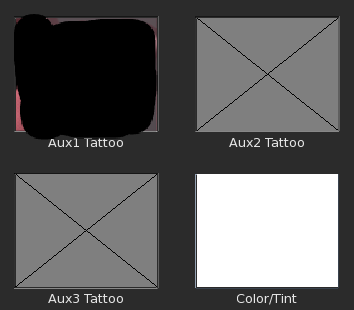
Secondary, your best friend is another clothing layer called UNIVERSAL, this buddy right here will be your bestie, because this badass little thing will come with a banging 11 layer spaces + color tint and this is going to be your bestie!
Step 2: Making your product
So now that you know your layers is time for you to know HOW TO put your mods together. So you have your customer request + parts list that they require made so they can use their brand, new spanking mod you made them… well:
- We start with you creating the skin*, in here you will put your upper and lower bodies + add the head layer for the head of your client’s choice.
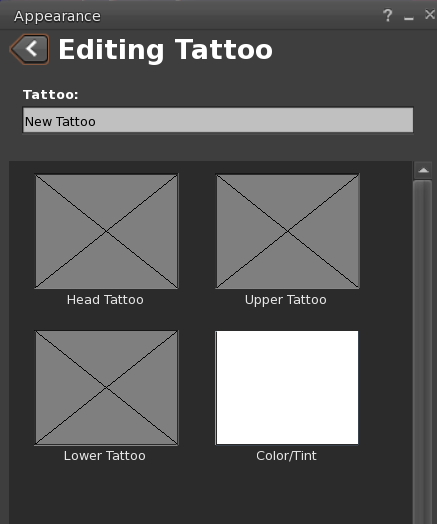
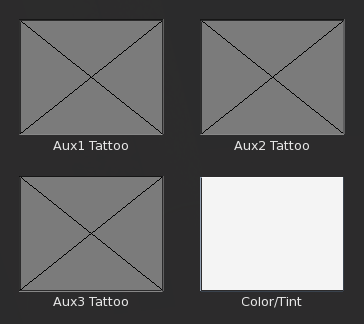
- Create a Universal Clothing layer and focus on the following layers: Aux1, Aux2 and Aux3 Tattoo Layers (see image), this is where you will place the textures for the items they requested (Tails/Ears).
*IMPORTANT: If it is not a client commission and instead you plan on selling for different heads, it will be better if the head layer is added to the Universal not the Skin. It is also important that in your listing you include the information regarding to what parts it was made for as well as a note that a medium edit knowledge is needed.
Step 3: Prepare/Test on your objects/parts
So now that you have all textures ready for BOM, you need to prep the objects to read the appropriate channels, meaning you need to make your objects BOM as well.
For this example I will be using the HP Deer Head, wear it and go into edit mode:
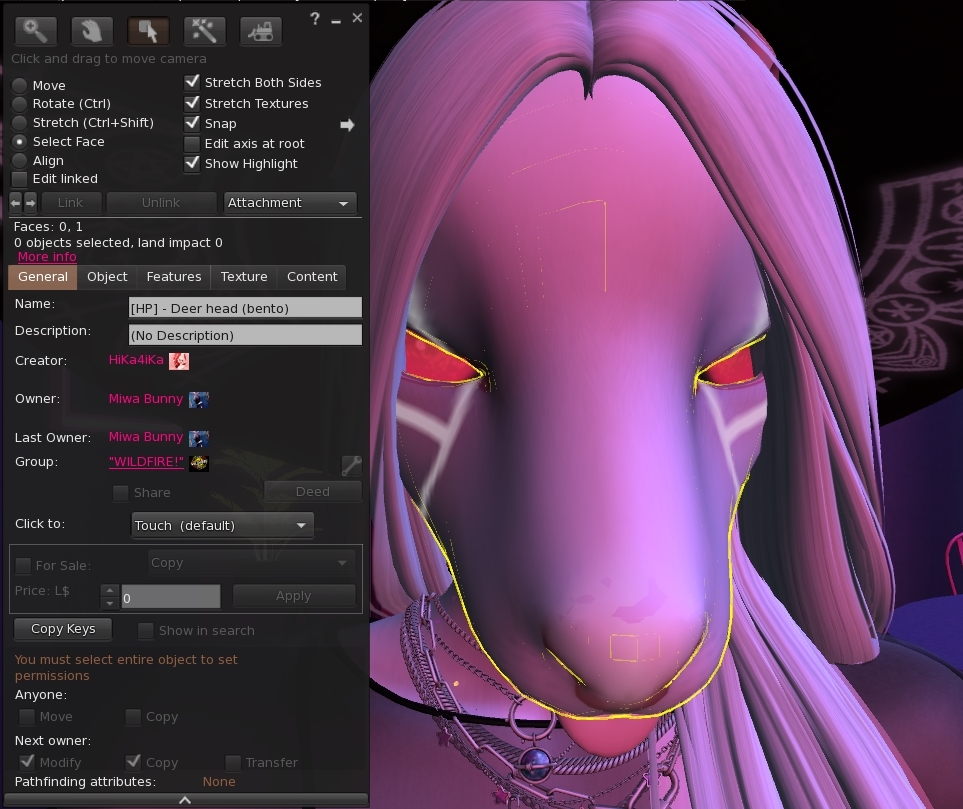
- Right-click on the head.
- Click on EDIT.
- Click on SELECT FACE.
- While holding SHIFT, click the faces that need to be edited.
- Go to the TEXTURES Tab.
- Click on the big SQUARE.
- Then click on BAKE.
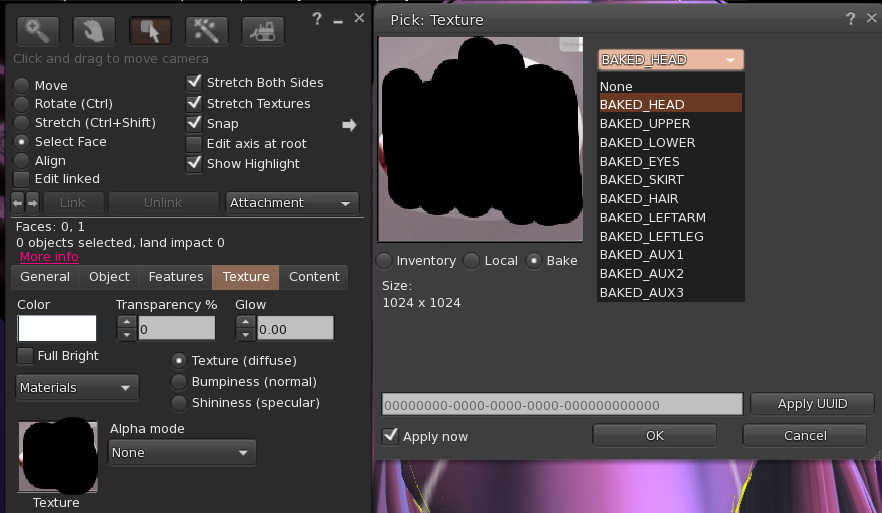
- And select the layer to be read from the list.
Since this is for a head, you need to choose BAKED_HEAD.
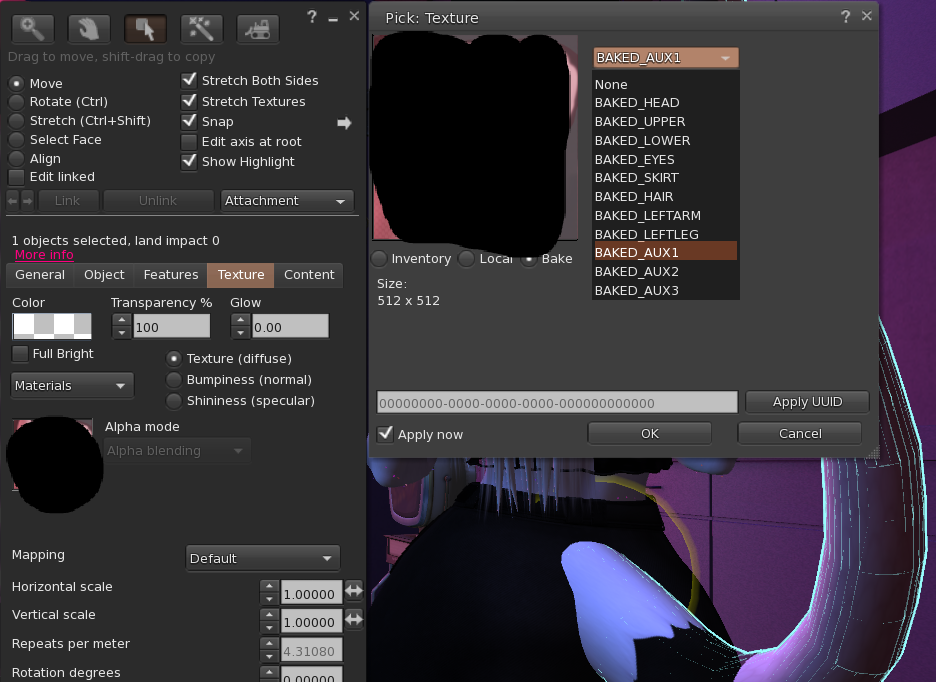
For parts you repeat the steps above but instead of using BAKED_HEAD you have to go into the AUX Channels of your UNIVERSAL. In this case the AUX1 Tattoo that will need to be BAKED_AUX1.
Once you have done this, the system (aka Second Life) will read the information you have input and read the specific layers You configured and apply it. The process mentioned above needs to be repeated for as many objects/parts that are required by your customer or potential clients.
As a final recommendation, you should include a notecard on how to use your product, feel free to link the Tutorial I made for Residents in case you need to and just use this format for them to know what BAKED belongs to what part.
- Head: Part name – BAKED_HEAD
- Tail: Part name – BAKED_AUX1
- Ears: Part name – BAKED_AUX2
- Makeup/Other: Part name – BAKED_AUX3
Or you can also recommend the use of the HUDs that the store {Kitty} has made available, it is a quick way to enable BOM on parts. You can find the full listing HERE.
Special thanks to Jay from Wicked Pup for pointing this product out.
Hope this tutorial was useful and that you keep enjoying your Second Life experience. Here is the resident tutorial post. BOM: A MIWA BUNNY HOW TO GUIDE FOR RESIDENTS
Updated July 5th, 2021
